Showing posts with label Cooking. Show all posts

Monday, 20 January 2014

Garlic Soup

Just back from a rather long trip from delhi. There is something about that place, i hated it while i was there but now i enjoy spending time in Delhi. May be now that I am merely visiting rather than living I can overlook the not so good part and instead enjoy the great parts. So despite the freezing weather I really enjoyed delhi, met some old friends and had some great street food :p


And the funniest thing happened , while I survived the freezing cold of delhi, I caught cold the moment I landed in bangalore :(.  So this gave me a chance to try out the Garlic Soup recipe i mentioned in my earlier blogpost   from my now favorite blog, Manger 

For my version of Garlic Soup, you need


Garlic - 1 large head, separate out the cloves
Onion - medium finely chopped
Olive oil - 1 table spoon
All purpose flour - 1 teaspoon
Chicken Stock - One large bowl - replace with vegetable stock for vegetarian version
Red wine vinegar- one splash
Thyme - few sprigs
Eggs (optional)
Salt and pepper to taste


Heat pan, add olive oil.

Add chopped onion and garlic, fry on low heat for a minute, ensure that heat is very low and onion and garlic dont turn brown.

Add flour and fry for another minute.

Add chicken stock and turn up the heat, bring the mixture to boil, add thyme.

Simmer for 20 - 30 minutes.

Add a splash of vinegar.

Turn off heat .

Blend it to a soup like consistency. Add salt and pepper to taste.

Strain and serve

If you are adding eggs, put the  soup back on heat, beat an egg, place the strainer on top of pan , add beaten egg through the strainer.

Turn off heat and serve hot !


Veg Garlic Soup


Monday, 18 November 2013

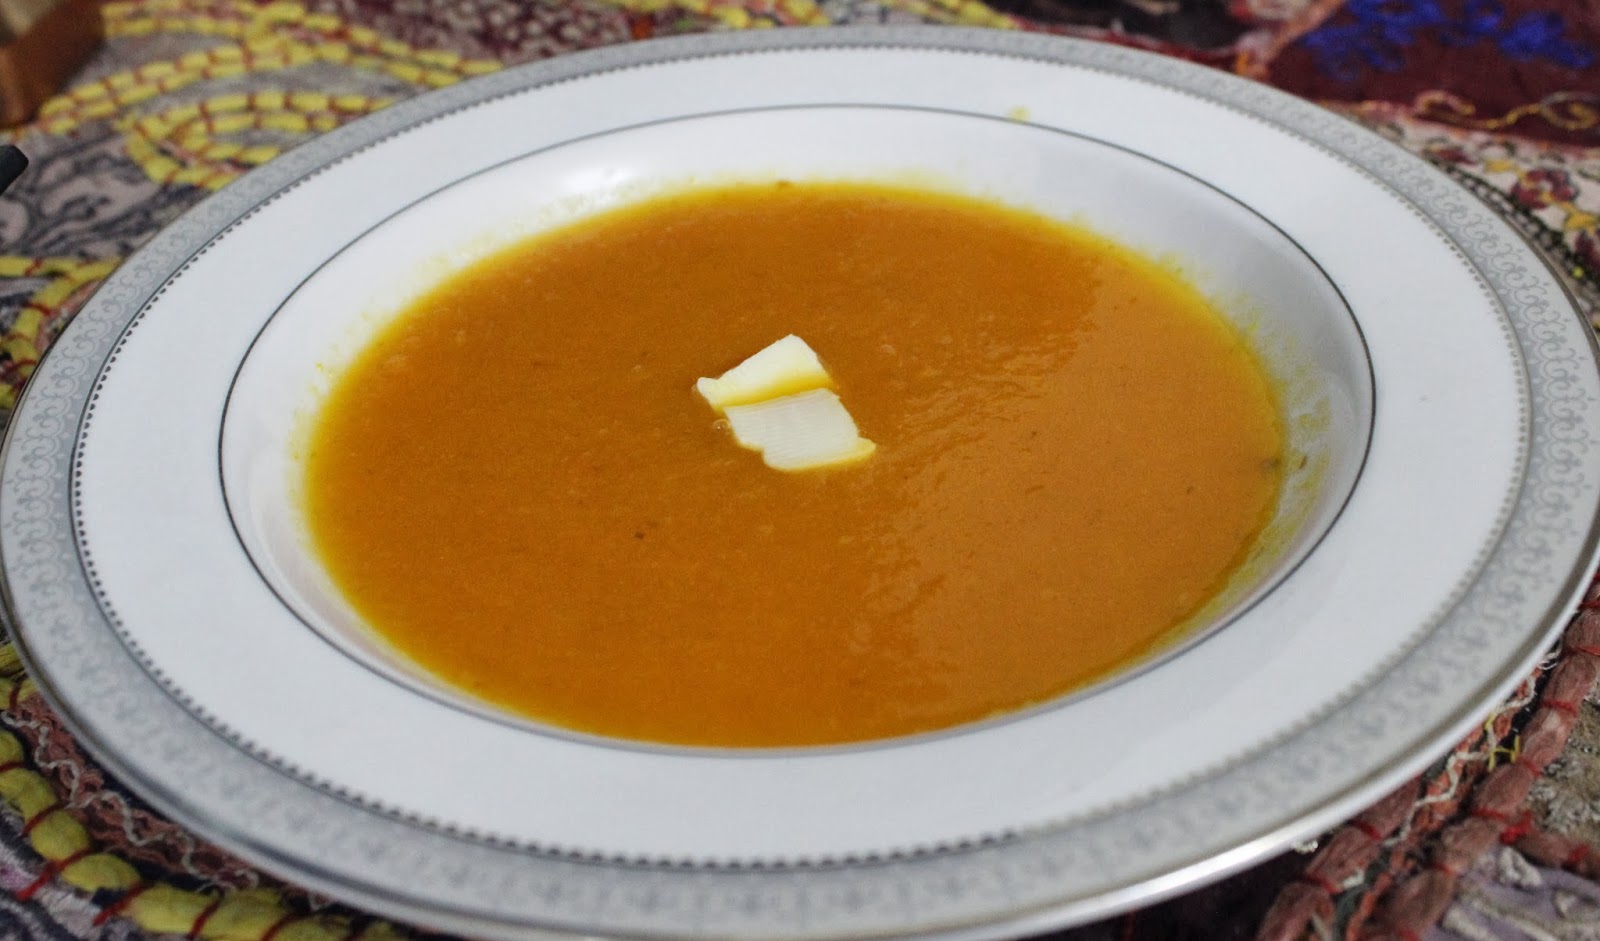
Carrot Soup


With the onset of winter my family's favorite afternoon / early evening 'snack' is soup. It's easy to prepare, tasty and healthy to boot.

So for this carrot soup you need :

Carrots - 5/6 
Tomato - 1 
Garlic -2 /3 cloves 
Potato - half medium or one small peeled 
Water - 1 glass 
Butter - 1 teaspoon
Salt & Pepper to taste

Put every thing together in a pressure cooker  (except butter , salt & pepper ) and cook for 3-4 whistles on medium heat. If using slow cooker , set it on with sufficient water till all the vegetable cooks throughly.  

Once the mixture cools a little, use a  blender and mix it to soup like consistency. Put the mixture back on heat , add butter , salt & pepper, serve hot with crackers 


Wednesday, 13 November 2013

Dahi ke kebab

Not sure if i have mentioned this before but Husband is super picky eater - no milk or milk related products, no fish , no red meat the list is really endless , so on most of the days i have a very limited choice to cook for.

But now that husband is traveling and my parents are here, we are getting to experiment a bit in the kitchen. So for today i tried 'Dahi ke kebab', i had this first with mum in the restaurant "Sahib Singh Sultan" a while back. I searched the net for recipe and there are quiet a variation there, so after reading through all the recipes and trying from my experience i followed the following recipe.

You need

Curd - 1 cup
Besan - 1 full teaspoon
Sattu (roasted bengal gram powder)  - 1 full teaspoon
Red chilli powder - 1/3 teaspoon; less or more depending on taste
Turmeric powder - 1/3 teaspoon
Salt - to taste
Garam masala powder - 1/2 tea spoon
Zattar powder - 1/2 tea spoon (optional)
Oil for frying (1 full table spoon)


Tie curd in a plain cotton cloth / cheese cloth and hang it so all the water drains out (hung curd)

In this mix add all other ingredients except oil.

Heat a not stick pan , add oil

Once hot, form the curd mix into a small patty like shape and fry on pan till each side turns crisp.

Serve hot with your favorite chutney or sauce.


Sunday, 10 November 2013

Kaikari Ishtew

After a rather heavy lunch yesterday, mom and me wanted to make something simple and flavorful for dinner so we finally zeroed on lemon rice and Kaikari Ishtew .

Kaikari ishtew is a coconut based dish usually had with appam. We tried it with rice and turned out equally good. I followed Sanjeev Kapoor recipe from Matering the art of Indian cooking  with slight tweaks (reduced the chilli & replaced coconut oil with sunflower oil)
You need :

Carrot - 1 medium cubed
Potato - 1 medium cubed
Cauliflower - 1 small cut in florets
Onion - 2 small chopped finely
Ginger, Garlic paste - 1.5 teaspoon
Cooking oil - 1 teaspoon
Bay leaves - 2
Cinnamon sticks - 2,  1" sticks
Cloves - 4
Star anise - 2
Curry leaves - 10/12 leaves
Green chillies - 2 whole (recipe called for 4 chillies stemmed and slit)
Coconut milk - 1 full cup
Salt to taste
Garam masala powder - 1/2 teaspoon


To prepare the Stew

In a wok add a glass of water and bring to boil.

When water comes to boil, add vegetables and let it cook for 2-3 minutes

Drain hot water and toss vegetables in cold water so it stops cooking.

In the wok add oil, once hot add bay leaves, cinnamon sticks, cloves, star anise, chillies, curry leaves  and chopped onions.

Saute for a minute

add ginger garlic paste and stir , let the whole mix cook for couple of minutes on low heat

Drain water from vegetables and add it to the wok, add salt and coconut milk

Cover and cook for 2-3 minutes

Once vegetables cooks (make sure it doesn't overcook and becomes mushy)

Add garam masala powder , mix well. Turn off from heat, serve hot !


Thursday, 24 October 2013

Baigan Bharta (spicy egg plant mashed)

Winter is just around the corner, though not in Bangalore - its just been raining incessantly :( , still the good part about winter is the abundance of fresh vegetables and i especially love the peas , the sweet and soft variety which i end up eating raw while trying to shell for vegetables :)

One of the winter staple for me is baigan ka bharta (mashed eggplant) again a simple dish and quick to make.

You need

Eggplant (Baigan) - 1 large
Green Peas -  1/2 cup (fresh or frozen)
Onion - 1 large chopped finely
Tomato - 1 large chopped finely
Ginger - 1' finely chopped
Green chillies - 1 finely chopped
Cumin seeds - 1/2  tea spoon
Cumin powder - 1/2 tea spoon
Turmeric - 1/3 tea spoon
Salt - to taste
Cooking oil - 1 teaspoon
Coriander leaves to garnish


To cook.

Clean eggplant throughly and slit eggplant length, ensuring the base remain intact.

Roast it on open flame on stove or in the oven till its cooked thoroughly (put a skewer, there should not be any resistance)


Once roasted and slightly cooled, peel the cover and mash.

Now in a hot wok (on medium flame on a stove) add oil, add cumin till it splutters.

Add ginger, green chillies, saute for half a minute

Add  onion and fry for couple of minutes , till it turns little golden

Now add remaining tomatoes , saute for a minute

turn heat to low, add cumin powder, turmeric , salt and cook for 4-5 minutes

Now add peas , mashed egg plant

Again on low heat cook for 5-6 mins, remove from heat.

Garnish with coriander and serve hot


Wednesday, 23 October 2013

Lal Saag & Chana

So my mum was in Singapore in last four months with my sister, along with all the festivities she was also missing the season of all the different variety of 'Saag' available  in abundance in during this time in India especially in Bihar.While the most common variety of Saag - Spinach is available every where in the world. But varieties  like Laal Saag (Red amaranth) Bathua etc are kind of limited to northern india.


 Now that she is back in India one of the first dish to cook was 'Lal Saag with kaala chana' 


You need 

A bunch of Lal Sag

Kaala chana (black gram) a handful -  soaked overnight 
Red chilli - 1 or 2 whole 
Ginger (1/2') - chopped finely 
Onion - 1 medium , finely chopped
Turmeric -1/3 teaspoon
Salt - to taste.
Cooking oil - 1 tea spoon 

To prepare.

Clean out the leaves (remove the hard stalks) and chop roughly.
Heat oil in pan, add red chilli ginger, onion. Saute on medium heat for couple of minutes.
Add chopped lal saag leaves and saute further for couple of minutes.
Turn heat to low, add turmeric , mix well , cover and cook for 10 minutes.
Keep checking the mixture in between, if it turns dry and start sticking add a little water.
Now add salt and soaked Kala chana, again saute for couple of minutes.
Cover and cook for 10 minutes.

Serve with hot roti / parathas.


Wednesday, 25 September 2013

Achari Bhindi

Bhindi (lady finger) always evoke strong reaction from most of the household, people either love it or like my sister can't stand the 'slimy nature' of this simple vegetable. 

However due to its high fibre content it's highly recommended for good health so I try and incorporate at least once every week . I mostly cook it like a dry vegetable in bit of mustard oil but once in a while make achari bhindi, slightly spicy and perfect with plain parathas .  it's  also a great and easy way to use the leftover masala bit from your regular achar.

This is what you need :

Serves 2 

Okra / lady finger / Bhindi (250 -300 gms ) - sliced into 1 inch long pieces

Onion -1 large - sliced very thinly

Mustard oil / any cooking oil - 1 1/2 table spoon

Achar masala -1 table spoon 

Turmeric powder -1/3 teaspoon 

Salt - to taste 


In a wok / heavy pan heat one table spoon of oil on medium flame.

Add sliced Lady fingers and sauté for a couple of minutes( be gentle while sautéing else it would break ).

Turn heat to low and cover and cook till about

80% done.

Remove from wok, keep aside.

In the same wok add remaining half table spoon oil add sliced onion.

On medium heat cook onion for 2-3 minutes till it becomes transparent  and little soggy.


Add achar masala, salt and turmeric and mix well and continue to cook for a minute or so.

Now add back cooked bhindi and gently mix all well.

Turn heat to low and cook till bhindi is completely done.

Serve hot with parathas, also great as a side dish with Rice.


Jeera Rice (Cumin Rice)

A simple variation on plain rice, perfect for the time when you want something fancier than plain rice and yet not take the complications of Biryani.

Although simple it's packs quiet a punch in terms of flavour. Bonus it also brings goodness of cumin. Cumin  is  featured  prominently in Mexican, Mediterranean, Indian, Middle Eastern, and certain Chinese cuisine. 
Cumin seeds contain a good amount of iron. Iron is an essential element for the formation of hemoglobin in the blood required for transport of oxygen.Cumin helps control stomach pain, indigestion, diarrhoea, nausea and morning sickness.For further detail read here http://completewellbeing.com/article/small-cumin-big-benefits

Now to the dish , 
you need :
Rice - important to use good quality basmati rice 
Clarified butter (Ghee)  / cooking oil - 1 table spoon 
Cumin - 1 teaspoon
Green chilli (optional)-1 sliced 
Salt - to taste 
Preparation : 
Soak rice in room temperature water for 10 mins, drain and leave aside.
 In a wok / heavy pan  add clarified butter and heat on medium flame. 
Once hot add cumin seeds let it splutter for few seconds . Be careful about the heat so that cumin turns golden and not dark.
Add green chilli ( if using) Now add drained rice, mix well for a minute add salt and turn off the heat.
Add water Transfer it into rice cooker / pressure cooker / microwave bowl to cook,  as you would normally cook rice. Rice can be cooked in pan / wok directly over medium heat in about 10- 15 mins, adjust water as required.I garnished with some finely chopped spring onions.Jeera Rice is excellent to serve with rich gravies , dal makhani etc , its simple and subtle flavour is excellent to compliment the richness of gravies.

Wednesday, 18 September 2013

Vegetable Pulao

A favourite potluck lunch, a meal in itself , full of flavours and healthy. Serve it on its own or bit of curd / raita on sides.

Serves 2
Rice - wash drain and keep aside 
Ghee (clarified butter) / Cooking oil -1 table spoon 
Onion -1 medium finely chopped
Ginger garlic paste (or crushed) -1 teaspoon
Tomato -1 table spoon purée or crushed 
Green chillies -  1 finely chopped
Vegetables - assorted chopped small - 1 cup


Spices (you can eliminate any if its not in pantry or you don't have a taste for it), I used 
Bay leaves -2 
Cinnamon - 2"stick
Peppers- 5/6
Cloves -2/3
Star anise -1
Mace 
Coriander seeds -10/12


Salt - per taste
Turmeric 1/3 spoon 
Garam masala powder - 1/2 teaspoon 
Coriander leaves for garnishing.


In a heavy wok, add Ghee and keep the flame to medium. Once hot add all the aromatics ( spices) , sauté for 30 seconds. Add ginger garlic paste sauté for further 30 seconds.

Now add onion and green chillies (if using) and sauté on low heat for a minute. Now add all the vegetables, turn heat to high, sauté for another minute add tomato purée, salt, turmeric and mix well for a minute or so. Now add rice , turn off the heat, mix well for a minute.

Add Garam masala , transfer into a microwave bowl add water and microwave on high for 20 mins. In case you are not using microwave you can use pressure cooker or rice cooker . In pressure cooker cook for 2 whistles and in rice cooker per the instruction. 

Vegetable Pulao ready to be served in 30 minutes.


Monday, 9 September 2013

Baigan fry

It was Teej yesterday, very important festival for all Bihari married ladies , it's a day we keep fast and pray to lord shiva parvati for long and happy life of our husbands and families.

Our fasting starts from the morning of Teej ( we are to get up before sunrise and eat something as 'sargahi') and continues till next morning , when we do the puja rituals and breaks the fast with prasad.

The typical breakfast this day is an elaborate meal to compensate for all the fasting of previous day. We have Rice,Godla ( recipe here), chakka , baigan fry etc. it's a huge meal and so sleep inducing. It's a great thing that we are in Bangalore now cause the day after Teej is Ganesh Chaturthi, that means holiday and that means post breakfast siesta is totally doable :) 

So for today I will share the recipe of this very simple baigan (egg plant) fry that I made.

You need :

Small size egg plants , slit into 4 , stalk intact -6/7

Chat masala powder / amchur powder - 1 table spoon 

Nigella seeds (mangrail / kalonji) -1 teaspoon

Mustard oil -1 table spoon to marinate and extra for frying 

Turmeric -1/3 teaspoon 

Red chilli powder -1/2 teaspoon ( as per taste) 

Salt - to taste 

In a utensil prepare marinade by mixing together mustard oil , chaat powder, kalonji, red chilli powder , turmeric powder and salt.

Next coat each egg plant with this marinade, ensure the inside cut portion is covered completely.


Let it marinate for half and hour (in case you want to marinate for more than half hour, add salt half and hour before cooking, else it would become too soggy) 

Now heat a wok - I normally use my cast iron wok for this. Add a generous amount of mustard oil , let it reach smoking point. Turn heat to medium and add egg plants , keep the oil hot and turn over each egg plant till the skin becomes crispy. 

Turn down heat to low and cover and cook till it is cooked completely. Turn back heat to high for a min, rotate egg plant all over, the skin should be crispy and golden.

Garnish with chopped coriander , serve hot.


Tuesday, 3 September 2013

Potato leek soup hack

There are times when you crave for a taste but don't have time or patience to prepare the elaborate way.

This is a hack for my all time fav soup , potato leek soup , most of the time I have it on its own with a slice of garlic bread on side. 

For this you need ( one portion) 


One large potato 
Leek : finely chopped (2/3 cup)
Onion : finely chopped (1/3 cup)
Cheese (per choice ) - grated (1/4 cup)
Salt and pepper to taste.

Cook potato in microwave high setting for 2-3 mins .

In a pan sweat out chopped onion for couple of mins. Add leeks , salt and pepper and cook for 2-3 mins on low heat, turn off heat and remove from pan

Slice potato length wise, (it should be cooked 20-30%)

Scoop out the middle portion from potato (not completely ) 

Fill the scooped out portion with leek onion mix , add grated cheese on top.

Put in oven (200 degree centigrade )  for 15-20 mins till turns golden and crispy .

Also is an excellent side with roasted chicken 

(Served here with garlic roasted chicken , grated carrot )


Friday, 30 August 2013

Lunch in a bowl - Egg Biryani

For my lunch in a bowl today,  I tried this super simple variation of all time fav biryani. I used eggs , you can use any meat or lots of vegetable.

Things you need :

One small red onion - sliced thinly 
Green peas - 1 cup (frozen or fresh) 
Ginger - 1/2 spoon paste or crushed finely
Garlic -2/3 pods crushed or half a spoon paste 
Bay leaf - 1 
Star anise -1
Cinnamon - 2 , 1/2" pieces
Cardamon -    1
Red chilli -1
Black peppers - 5-6
Biryani masala -1 table spoon
Garam masala -1/2 tea spoon
Turmeric -1/3 teaspoon 
Salt - to taste 
Cooking oil -1 large table spoon (I prefer ghee for biryani)
Egg - 2 boiled for 8-10 mins
Rice - 1 portion 


For rice preparation 

In a deep pan , boil 2/3 cups of water, add 1/2 teaspoon salt, bay leaf, star anise and 1 stick of cinnamon.
 
Once water comes to complete boil , add rice mix well, cook uncovered on high heat for 3-4 mins , switch off and cover the pan completely, this should help rice cook in its own steam.

Check for rice after 6-7 mins , it should be 60-70% cooked, drain all extra water.

Rinse with normal temperature water and leave aside.


For masala prep :

While you are cooking rice, in a wok add 1//2 of cooking oil , once hot add cardamom, pepper, red chilli and sauté on medium heat for 30 seconds, add ginger garlic and sauté for further 30 seconds.


Now add sliced onion, peas and turn heat to low, fry for couple of minutes and add biryani masala (adjust for water when ever mixture gets too dry or starts sticking ), add turmeric powder and salt.


Cover and cook for 5 mins on low heat.

After 5 min remove cover add boiled eggs and water , turn up the heat to medium and cook for further 2-3 mins, the consistency of masala should be of thin paste (not too watery) 

Turn off heat, remove masala from wok and keep aside.


In the same wok add remaining oil (1/2 tablespoon), turn on the heat to medium, layer half of rice in the wok.

Now add the cooked masala all over the rice, spread evenly.


Now layer the remaining half of rice on top, covering the masala completely .
Sprinkle garam masala on top add 1/4 cup of water from side ( around the edge of rice), turn heat to lowest level and cover completely .

After 2-3 mins turn off the heat and leave it rest. Ensure that lid is firmly secured so rice gets to cook completely  in its own steam.


After 5 mins quickly check if rice is done, else let it rest for some more time. Once done sprinkle some chopped coriander leaves for garnish and serve.

I like to have this biryani on its own you can have a bit of raita / curd on the side.


Tuesday, 27 August 2013

Easy weekday dinner - Baked Broccoli


It was just one of those days, back to back calls, meetings emails and skipped lunch , by the time I reached home I swear I could have eaten anything , but there was nothing remotely interesting in fridge.
I wanted to make something fast, easy and filling . now I am not a fan of broccoli but everything tastes good with cheese so I thought of making baked broccoli.

Here is my version

Slice up one large potato real thin - I didn't even bother to peel, just washed nicely.

Layer it in the baking pan , grill it on high setting in microwave for a min (I have LG convection microwave which has plenty of features like grill, bake, auto cook etc).

Next, thinly slice cloves. chop broccoli in small florets, arrange this on top of potatoes, sprinkle salt and pepper, grate cheese ( lots of !) on top of this mix and for something crunchy I just crushed some cereals ( breakfast corn flakes on top)

Back in the microwave ( you can use normal oven 200 degree centigrade for 20 mins) on 'auto cook gratin' setting.

15 mins later, with a glass of red wine, I had the perfect dinner with me .

Now bring on the Wednesday :)

Saturday, 24 August 2013

From mum's kitchen 'Godla'


The ultimate comfort food from mum's kitchen -not sure if there is any fancy name for this but in Bihar it's called 'Godla'

So this is what you need:
Kala chana (Black gram) - 1 cup
Potato -1 medium size
Onion - 2 medium 
Ginger -1/2"
Garlic -4/5 pods
Cumin powder -1 tea spoon
Coriander powder - 1 tea spoon
Turmeric powder -1/3 teaspoon
Garam masala powder - 1/2 teaspoon
Bay leaves -2 /3
Badi elachi  (Black cardamom )- 1 
Red chillies -2/3 depending on taste ( I also remove the seeds to reduce heat and still get that slightly smokey flavour)
Ghee (Clarified butter or any other cooking oil) - 1 generous tablespoon 
Salt - to taste


Prep :

Soak kala chana for at least 4-5 hours
Grind it into a coarse paste - try not to make a too fine paste, this is a rustic dish, all the different texture of chana adds to the flavour


Chop up 1  1/2 onion finely
Use remaining half onion, ginger and garlic and make a rough paste.

Now heat ghee in a pressure cooker, add bay leaves, black cardamom and red chilli, sauté for half a minute 

Add the onion, garlic and ginger mix , sauté for further 2 mins , add the chopped onion , turn down the heat to low and let the onion sweat completely , mixing this masala every couple of minutes.

After about 8-10 mins when the onion becomes all soggy , add cumin, coriander and turmeric powder , keep the heat low and sauté for further five mins.

Into this mix add the kala chana mix, sauté for again 10- 15 mins, you don't have to mix constantly just every couple of mins, ensure the heat is at the lowest level so it doesn't burn or sticks.
Cut potato into 4/6 piece add it into the pressure cooker , mix well.

Add salt, garam masala powder and 3-4 cups of water.

Cover and cook on medium heat for 3-4 whistle.

Serve with hot plain rice, plain onion and a dollop of ghee...pure bliss

Friday, 23 August 2013

Lunch in a bowl - Chicken noodles

Given that I work from home most days of the week, I usually want to have something light for lunch, easy to prepare and eat between meetings and emails. So I thought I will start a series with 'lunch in a bowl' , will try to keep it quick and nourishing.

First up : Chicken noodles 

This is how I went

Boiled noodles in salted water, till al dente (2-3 mins before the  require time)
Drain, rinse under tap water - so that it stops cooking, set aside.

Thinly slice 1/2" of ginger, 1 clove of garlic.
Slice up all the vegetable you have in fridge sufficient for one portion. I had onion , yellow pepper, cauliflower. You can add mushroom, capsicum, cabbage, carrot , whatever is there .


In a wok heat one table spoon of cooking oil , once hot add the sliced up vegetables , ginger and garlic and stir on high for couple if minutes.
In a bowl mix half a teaspoon each of  soya  sauce, chilli sauce, tomato sauce,  1 teaspoon each of vinegar and spring roll sauce (current favourite love the mix of chilli and something sweet), few drops of Tabasco sauce - for extra kick and 1 tablespoon water

Add this mix to the wok, turn down the heat to medium .
To this mix add bite size pieces if boneless chicken(or any other leftover meat you prefer)


Cook for couple of minutes. On medium heat till chicken is almost done. Adjust water as required.

Now add the noodles , sauté around of couple of minutes so noodles is completely covered in sauce .

Turn up the heat, break an egg into a bowl, beat up nicely and add this mix to wok.


Quickly mix it in wok so it covers all the noodles completely, stir for half a minute, check for salt and adjust per taste.

Turn of the heat, garnish with some onion leaves and serve yourself. Your quick and easy lunch done in under 15 mins.


Monday, 19 August 2013

From my middle eastern kitchen - Hummus


After many attempts in making hummus , I have finally figured out a recipe which in my husband's opinion is 'pretty close' 
to perfect ones.

So here is what you need for this 'pretty close to perfect hummus recipe'

Dry Chickpea - 1 cup
Olive oil - lots (almost half a cup)
Garlic -3/4 fat cloves
Seasme seeds - 1 tablespoon 
Salt to taste
And 2 back to back episode of your fav tv series - this is important, I will tell you when I come to it.

Now the perp 

Soak sesame seeds overnight or atleast couple of hours, drain and keep aside.

Soak chickpeas overnight ( at least 12-14 hours), drain extra water and put it in pressure cooker to cook for 1 whistle.

Once cool enough to handle drain out all water and remove each chickpea shell. This is where those tv episodes come in handy, shelling chickpeas is quiet mindnumbing  you better put that tv series on:) and dont try to skip it, this is vitally important for the silky smooth texture.


Now in a blender, add chickpeas , sesame seeds, garlic pods, salt and olive and blend really well on highest possible setting.

Keep adding olive oil when you feel mixture drying up.

You really really have blend well , I mean once you think you are done add little olive oil and blend for 5 more mins. You would definitely get that super smooth silky texture if you really blend well...and that's it you are done.

This is the basic version, and in my opinion the best, we have it with pita breads, in sandwich as a dip with tacos or just like that ... All time fav !

Thursday, 8 August 2013

Cabbage moong dal

Feeling a little inspired from my earlier two experiments in the kitchen, today morning I tried my third , fortunately this one also turned out good :)


I had heard about a similar dish from a friend and I thought I will try to create on my own ( without trying on dear darling google for an authentic recipe ) 

So for my version of moong dal with cabbage, you need :

Split moong dal : 1/2 cup
Cabbage : half head
Onion :  1 small
Curry leaves : 8-10
Ginger : grated or chopped -1/3 tea spoon 
Black mustard seeds : 1/2 teaspoon
Salt : to taste
Turmeric powder : 1/4 teaspoon 
Oil: 1 teaspoon 

Soak moong dal overnight (10-12 hrs) , drain and leave it in sieve so there is no water left.
Finely shred cabbage head
Finely chop onion
Heat oil in a wok on medium heat
When it's hot , add mustard seeds, curry leaves , ginger.  sauté for 30 seconds 
Add shredded cabbage , sauté for a minute now  turn down the heat to low.
Add moong dal , turmeric, sauté for further one minute .
Cover the wok and let it cook for 10 mins on lowest heat level, mix it once in a while so it does not stick, avoid adding water.
After 10 mins , everything should be cooked , but still a bit crunchy. Add salt now and remove cover and cook for a minute (Adding salt at the end ensures that cabbage retains its texture and doesn't become soggy)

Serve as a side dish , or as breakfast dish.
Since I had a bit of onion growing in the pot I used its leaves for garnishing ( completely optional ) 


Wednesday, 7 August 2013

Avocado cheesy cups

Sometimes disappointments can turn into a sweet ( in my case cheesy savoury) victory .

I was all in a mood to make a nice guacamole dip today , but to my disappointment I realised that the avocado I had was not ripe enough . I did not throw away the avocado and went to net to look for some kanadda / coorgi recipe that uses avocado or butter fruit as its called here - I had seen few butter fruit tree in coorg and assumed there must be some local way of cooking it.  Somehow I could not really find anything that I could really try. Further trolling on net I found pics of egg baked in avocado , it surely looked pretty enough .  Reading through the reviews, most of people complained that it made avocado too mushy and that got me thinking, may be too mushy for a ripe avocado but just might be perfect for the one I had in fridge!


So with my creative cap on, I scooped out the pit from avocado, rubbed  a pinch of salt all over, finely chopped onion and tore up sliced cheese into small pieces and filled the cup ( there is no egg in fridge  today :( ) , sprinkled a bit of rock salt, pepper and splash of Tabasco sauce and grilled in microwave for 3 minutes ... Creamy cheesy avocado cup done in a instant :) :)


On a different note, do you have any local recipe for avocado ? please share.


Monday, 5 August 2013

Arbi masala

I did a bit of experiment in the kitchen and since it turned out good , thought I would share with you all. 

This is what you need : 
 Arbi / Colocassia  (medium size) : 250 gm
Green tomato : 2 medium - sliced thinly
Ajwain( carom seed) : 1/3 of tea spoon
Onion : 1 medium - sliced thinly
Amchur powder / chat masala - 1 tea spoon 
Red chilli whole (deseeded ) : 2-3 small
Garlic 2-3 cloves - finely slice
Oil: 1 tbs ( mustard or any cooking oil)
Salt 
Turmeric powder 


Now boil the arbi in pressure cooker for one whistle, remove from heat, drain and leave aside to cool.

Finely slice onion, tomatoes , garlic . Make a incision in chilli and  remove seeds ( it gives a nice someky flavour without the heat) 
Once arbi is cooled enough to handle, peel the skin ( be careful at this stage some variety really itches, in that case rub oil and lemon juice on hands before handling arbi)
Slice up boiled arbi in 4/6 pieces length wise.

Now heat oil in wok, once it smokes turn down the heat to low  for a minute, add ajwain seeds, garlic , red chilli and fry for 30 seconds. 
Turn the heat to medium
Add onion and fry for 2-3 minutes till it turns brown.

Add sliced tomatoes, turmeric powder , fry for minute , cover and cook on low heat for 3-4 minutes.

Add arbi and mix well so masala covers completely .

Cover and cook for 3-4 minutes on low heat till arbi is almost done

Add chat masala / amchur powder and salt and cook for 2-3 minutes till arbi is done.

Serve hot with roti / paratha 


Wednesday, 31 July 2013

Pan grilled chicken with home made pesto sauce & a side of grated carrot

Its a simple weekday dinner in a  slightly healthy version (subsitute cheese for coconut milk in pesto sauce & instead of mashed potatoes a side of grated carrots) 


For pesto sauce (without cheese)

Fresh basil leaves - 1 bunch 
pine nuts  1/4  cup- toasted slightly
garlic cloves - 3/ 4
olive oil - one generous spoon full
salt to taste 
table spoon of coconut milk

For Chicken 


Make small incision in chicken pieces 
with knife  (instead of breast , i went for a large thigh piece,more succulent),  rub 3/4 of pesto sauce all over and leave it to marinate for an hour or so

After an hour in a non stick pan ..add a tea spoon of olive oil, add chicken piece and cover and cook each side of 10 mins on medium heat

Remove cover add remaining pesto sauce and cook on high for couple of minutes each side so it browns all over 


After an hour in a non stick pan ..add a tea spoon of olive oil, add chicken piece and cover and cook each side of 10 mins on medium heat 


For Side dish 

I love mashed potatoes with chicken , i mean who doesn't , but mashed potato definitely doesn't fall into the healthy food criteria so instead i used a side of grated carrot. I had it for the first time in one of the tiny restaurant in Auroville and have been making it since then. Not as great as mashed potato, but a close second.

Grate a large carrot  mix salt , a tablespoon of lemon juice & olive oil. Keep aside for 5 mins so all the flavour mix well.


Serve it with chicken once done.


Tasty & healthy weekday dinner ready to be served ! 

Total Pageviews